




Home ESS Installation: Steps, Permits & Timeline
A home ESS installation guide should cover site scoping, permits, mounting, AC/DC/comms wiring, commissioning, inspection, and EMS setup. A simple project may need about two field days, while a five-day project is realistic when panel work, utility approval, firmware, monitoring, and final inspection are included.
Installing a home energy storage system is not only about fixing a battery to a wall. The real work starts with the site survey, permit package, electrical review, and manufacturer documents. If you understand the steps before scheduling, you can avoid failed install days, delayed inspections, and app setup problems. For broader system basics, read this home energy storage system guide.
What happens before a home ESS installation starts?
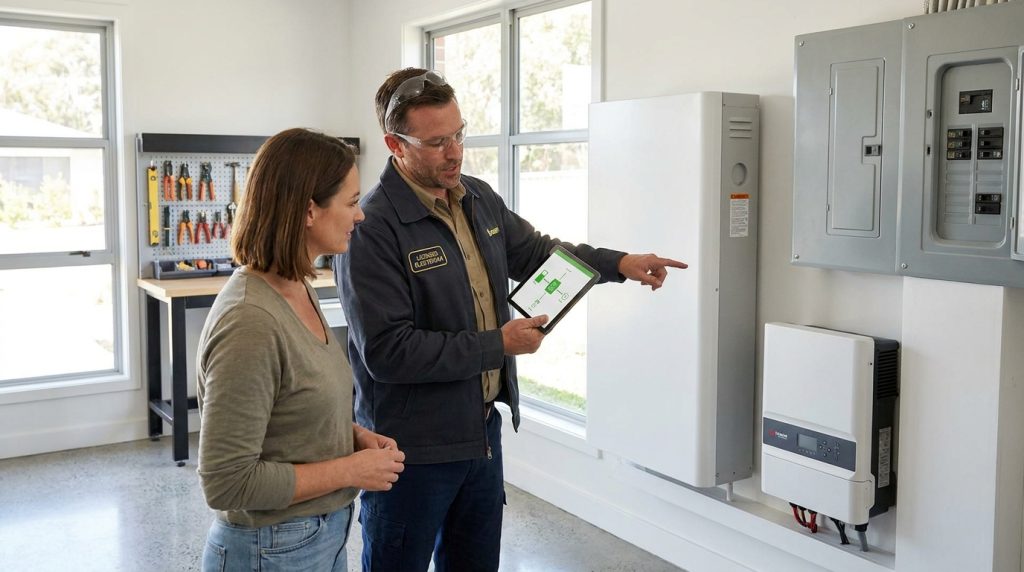
A home ESS installation starts before the installer arrives. The main pre-work is site scoping, electrical-panel review, permit submission, equipment confirmation, and checking that the manufacturer has supplied manuals, ratings, wiring diagrams, and app/EMS setup details.
The first step is a proper site survey. The installer checks your main panel, backup-load plan, inverter location, battery mounting area, internet access, and cable routes. They also confirm whether your system will connect to solar, grid power, or both.
Your installer should also prepare the documents needed for permit review. Code guidance from the Building America Solution Center notes that construction documents may include system type, size, location, ratings, wiring layout, inverter location, and emergency shutoff controls.
Before day one, confirm these basics:
- Backup circuits are selected
- Battery and inverter model numbers are confirmed
- Mounting location is approved
- Permit status is clear
- Manufacturer documents are ready
- App or EMS access is available
- CT meter, gateway, cables, and labels are included
This is also the right time to review a battery storage reference if you want to understand the core parts before the crew arrives.
Do you need permits and inspections for a home ESS?
Most home ESS projects should be planned as permitted electrical work. Local rules vary, but code officials may review construction documents, system ratings, wiring layout, inverter location, emergency shutoff, and final inspection readiness.
Permits protect the homeowner, installer, utility, and emergency responders. A home ESS connects to the electrical system, stores energy, and may supply backup power during outages. That means the authority having jurisdiction may review the system before it is installed.
The exact permit path depends on your city, state, utility, system size, and location. A local checklist from Berkeley shows that ESS submittals can include a site plan, floor plan, electrical plan, manufacturer specification sheets, listing details, and permanent directory information.
Inspection is the final proof that the system matches the approved plan. The BASC guidance lists inspection items such as system ratings, location, testing, labeling, inverter location, and emergency shutoff controls.
A good permit package should include:
- Site and floor plan
- Single-line electrical diagram
- Battery and inverter datasheets
- Listing or certification documents
- Labeling plan
- Emergency disconnect details
- Mounting and clearance notes
- Installer license details where required
Battery safety matters after installation too. The EPA notes that battery energy storage fires can create special response challenges, so clear siting, labeling, and emergency access should not be treated as small details.
How long does a home ESS installation take?
A straightforward home ESS may be installed in about two field days, but the full project often takes longer when permitting, panel upgrades, utility approval, inspection, firmware updates, or EMS provisioning are included.
The physical work can be fast when the site is simple. The full project timeline can be longer because permits, inspection windows, panel upgrades, and monitoring setup often sit outside the two field days.
| Stage | Simple 2-day install | 5-day project | Who owns it | Common delay |
|---|---|---|---|---|
| Permit and plan review | Completed before install | May still need corrections | Installer or contractor | Missing drawings or specs |
| Site preparation | Clear wall and panel access | Extra wall, conduit, or panel work | Homeowner and installer | Poor access or blocked space |
| Mounting | Battery and inverter mounted day 1 | Mounting spread across days 1-2 | Installer | Weak wall or location change |
| Wiring | AC, DC, and comms completed day 1-2 | Panel work and backup subpanel added | Electrician | Main panel limitations |
| Commissioning | App and tests completed day 2 | Firmware, gateway, or EMS takes extra time | Installer and manufacturer | Missing portal access |
| Inspection | Already scheduled | Scheduled after corrections | Installer and local office | Inspector availability |
2-day install scenario
A simple retrofit has existing solar, a compatible inverter, a clear garage wall, and no panel upgrade. The installer mounts the battery, completes wiring, configures monitoring, tests backup mode, and prepares for final inspection.
5-day project scenario
A longer project usually includes panel changes, backup-load redesign, extra conduit, utility coordination, or commissioning issues. Phoenix’s residential solar and storage permit process notes that battery systems may need plan review and inspection before grid connection, depending on project details.
This is why “two-day install” should not be sold as “two-day project.” It is realistic only when the permit, equipment, mounting location, panel capacity, and app setup are already solved.
Who should install the system, and what should they check first?
A home ESS should be installed by a licensed electrician or qualified installer who understands the manufacturer’s requirements. The first checks are compatibility, panel capacity, installation location, backup-load design, and local code requirements.
The best installer is not always the cheapest electrician. For a home ESS, product training and commissioning experience matter because many problems happen at the communication, monitoring, or configuration stage.
EPRI’s residential storage safety guidance says the system should be installed by qualified professionals, such as licensed electricians and manufacturer-certified installers where required. It also stresses following manufacturer instructions and local codes.
Before installation, the installer should check:
- Battery and inverter compatibility
- Solar inverter or hybrid inverter connection method
- Main panel rating and available breaker space
- Backup-load panel or critical-load plan
- Grounding and disconnect requirements
- WiFi or Ethernet access for monitoring
- Manufacturer commissioning process
If you are still comparing system types, review storage solutions compared before locking the installation plan. The equipment choice affects wiring, backup design, and future service options.
Where should the battery, inverter, and gateway be mounted?
The battery, inverter, and gateway should be mounted where they are safe, accessible, code-compliant, and easy to service. The best location is not always the nearest empty wall.
Indoor mounting is not automatically better. It works when clearance, fire separation, temperature, and access are right. A garage, exterior wall, utility room, or protected service area may be easier to inspect and maintain in many homes.
| Location question | Better choice | Watch out for |
|---|---|---|
| Is the wall strong enough? | Solid wall or approved mounting surface | Weak drywall or unknown structure |
| Is there enough clearance? | Open service area | Shelves, tools, boxes, or tight corners |
| Is it near the main panel? | Short, clean cable path | Long conduit runs and higher labor |
| Is the area exposed to heat or water? | Dry, shaded, ventilated space | Direct rain, flood risk, or high heat |
| Can emergency access be reached? | Visible disconnect and label area | Hidden equipment or blocked shutdown point |
| Is the gateway close enough? | Strong WiFi or wired network | Weak signal or no internet access |
Local checklists may also restrict placement in certain areas or require extra protection. Use the manufacturer manual and local inspection rules before choosing the final location.
An integrated home ESS can reduce layout complexity because battery, inverter, monitoring, and controls are planned as a system. The installer still needs to confirm clearances, cable paths, and inspection access.
What wiring work happens during installation?
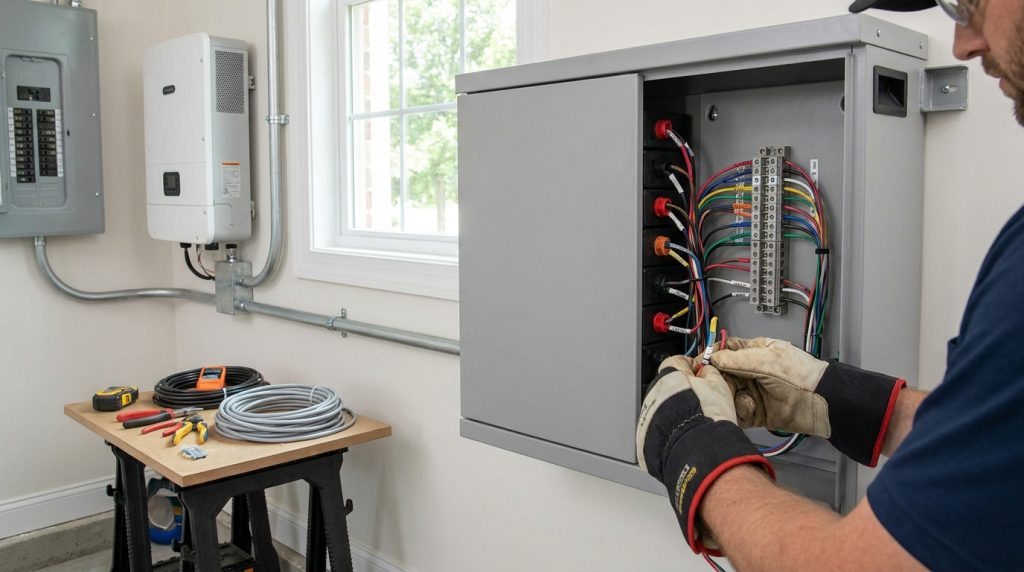
Home ESS wiring usually includes DC battery or PV connections, AC connections to the inverter and electrical panel, and communication wiring between the BMS, inverter, meter, gateway, and monitoring platform.
The wiring stage should follow the approved plan and the manufacturer’s manual. This is not a homeowner DIY task. The installer must keep polarity, grounding, disconnects, labeling, and cable routing correct so the system can pass inspection and commissioning.
AC wiring
AC wiring connects the inverter to the home electrical system. This may include the main panel, backup-load panel, transfer equipment, or gateway. The goal is to route power safely between the grid, inverter, battery system, and protected circuits.
For example, a homeowner may expect the HVAC, oven, EV charger, and whole home to run on one battery. The installer may need to limit backup to essential loads such as lights, router, refrigerator, medical equipment, and selected outlets.
DC wiring
DC wiring connects battery modules, battery cabinets, or solar-side equipment where the system design requires it. The installer must follow the battery polarity, voltage range, cable size, fuse, and disconnect instructions from the manufacturer.
If the design uses a hybrid inverter, the installer should confirm the solar and battery connection method before day one. For broader architecture choices, the hybrid solar battery system guide is the better place to compare system types.
Communication wiring
Communication wiring connects the Battery Management System, inverter, CT meter, gateway, and EMS platform. This small wiring layer often controls whether the system can be seen, tested, and managed in the app.
A missing CT meter or gateway can stop final provisioning even when the battery and inverter are already mounted. In that case, the system may be physically installed but not fully ready for owner use.
What happens during commissioning and EMS provisioning?
Commissioning confirms the ESS is wired, configured, and operating correctly. The installer should test charging, discharging, backup transfer, safety functions, monitoring connection, firmware, and EMS settings before handing the system over.
Commissioning is the point where the system becomes usable. The installer should confirm that the battery communicates with the inverter, the app shows live data, and backup behavior matches the approved load plan.
EMS provisioning means connecting the system to the energy management software. That may include setting tariffs, backup reserve, charge and discharge rules, grid mode, solar priority, user account access, and alarm notifications.
A commissioning checklist should include:
- Firmware version checked
- Battery and inverter paired
- CT meter direction verified
- Gateway online
- WiFi or Ethernet connected
- App account created
- Charge and discharge tested
- Backup transfer tested
- Alarm and fault history checked
- Owner shown how to read system status
An EMS-ready storage setup helps the homeowner see power flow, battery state of charge, backup reserve, and system alerts. Ask the installer to demonstrate the app before they leave.
What documents and parts should arrive before day one?
Before installation day, the manufacturer or supplier should provide the installation manual, datasheet, certification/listing documents, wiring diagram, mounting details, warranty terms, communication accessories, labels, and EMS or monitoring setup instructions.
Missing paperwork can delay permits. Missing accessories can delay commissioning. Do not wait until the installer arrives to discover that the gateway, CT meter, label set, or portal access is not included.
| Item | Why it matters | Who provides it | Check before install |
|---|---|---|---|
| Installation manual | Guides mounting, wiring, and startup | Manufacturer | Latest version available |
| Datasheet | Confirms rating and model details | Manufacturer | Matches purchased unit |
| Certification/listing docs | Supports permit review | Manufacturer or supplier | Correct market version |
| Single-line diagram | Shows system connection path | Installer or manufacturer | Matches site design |
| Mounting template | Prevents layout mistakes | Manufacturer | Fits wall or floor plan |
| Cable and accessory list | Confirms what should be in the box | Supplier | No missing parts |
| CT meter | Measures power flow | Manufacturer or installer | Correct direction planned |
| Gateway | Connects system to monitoring | Manufacturer | Network method confirmed |
| Label set | Supports inspection | Manufacturer or installer | Labels match code plan |
| EMS/app access | Enables commissioning | Manufacturer or installer | Login ready |
| Warranty documents | Protects owner after handover | Manufacturer | Serial numbers recorded |
A common delay is simple: the battery and inverter arrive, but the communication gateway is missing. The installer can mount equipment, but the owner cannot get full EMS visibility until the missing accessory arrives.
What can delay a home ESS installation?
The most common delays are missing permits, panel limitations, location changes, missing accessories, inspection scheduling, and app or EMS setup problems. Most of these can be prevented before day one.
A five-day project is not a failure if the work includes panel upgrades, extra conduit, corrections, or inspection timing. The problem is not the longer schedule. The problem is when no one explains it before installation starts.
| Delay | What causes it | How to reduce the risk |
|---|---|---|
| Permit correction | Missing plan, specs, or equipment details | Submit complete documents early |
| Panel upgrade | Main panel lacks capacity or space | Check panel during site survey |
| Bad mounting location | Clearance, structure, or access problem | Approve location before equipment delivery |
| Missing gateway or CT | Accessory not shipped with the system | Check manufacturer package before day one |
| Failed inspection | Labels, disconnects, or drawings do not match | Use inspection checklist before scheduling |
| Utility delay | Approval or interconnection not complete | Confirm utility steps before commissioning |
| Weak internet | Gateway cannot stay online | Test WiFi or plan Ethernet |
A clear schedule helps everyone. The homeowner knows when access is needed, the installer avoids repeat visits, and the manufacturer can support commissioning before the crew leaves.
What should you ask the installer before they leave?
Before the installer leaves, ask them to show that the system is safe, visible in the app, tested in backup mode, and documented for future service. Do not accept a handover based only on “it’s installed.”
Use this final handover checklist:
- Where is the emergency shutdown?
- Which circuits are backed up?
- What loads should not be used during an outage?
- Is the app connected to the correct system?
- What does each main alarm mean?
- Was backup transfer tested?
- Was charge and discharge tested?
- Is final inspection complete or pending?
- Where are the manuals and warranty documents?
- Who handles service if a fault appears?
- Has the warranty been registered?
- Are serial numbers recorded?
This is where many homeowners find hidden gaps. The system may look complete on the wall, but the handover proves whether it is ready for daily use.
What to Do Next
Use this home ESS installation guide as a checklist before you schedule the crew. Confirm your permit status, installer qualifications, mounting location, accessory package, inspection plan, and EMS access before day one.
If you are still choosing the system itself, solve that first. Installation goes faster when the battery, inverter, backup-load plan, and monitoring setup are already matched. Ask your supplier for the full day-one package, then ask your installer to walk you through the timeline before work begins.
Frequently Asked Questions
How long does a home battery installation take?
A simple home battery installation can take about one to two field days after permits and equipment are ready. Projects can take longer if the electrical panel needs upgrades, inspection must be scheduled, or EMS/app setup requires extra configuration.
Do I need permits to install a home storage system?
Most home ESS projects should be treated as permitted electrical work, but the exact permit path depends on your local authority. Plan for electrical drawings, equipment specs, location details, and inspection access before installation starts.
Can I add a battery to my existing solar panel system?
Yes, many homes can add a battery to an existing solar system, often through an AC-coupled retrofit or hybrid inverter upgrade. The installer must confirm inverter compatibility, panel capacity, utility rules, and communication setup first.
Are solar batteries safe?
Certified home ESS products are designed with safety controls, but safe installation still depends on correct siting, clearances, wiring, labeling, and emergency shutdown access. A qualified installer should follow manufacturer instructions and local code requirements.
What is the difference between AC-coupled and DC-coupled systems?
AC-coupled systems connect battery storage after the solar inverter, which often makes retrofits easier. DC-coupled systems connect storage on the DC side and are often better suited to new solar-plus-storage designs.
Do home batteries work without solar panels?
Yes, a home battery can work without solar if it is designed to charge from the grid. In that case, the main value is usually backup power, time-of-use shifting, or emergency resilience rather than solar self-consumption.

-

 OEM Residential Energy Storage Solutions: Passive vs. Active Cell Balancing
2026-09-30
-
 Smart Home Battery with BMS Communication: Cybersecurity and BMS Safety
 -
 10kWh Home Battery Backup System: Is 90% DoD Better for Daily Solar Storage?
2026-09-29
-
 Integrated Home Energy Storage System 150–430V MPPT Design
2026-09-28
-
 LiFePO₄ Residential Backup Battery SOC Accuracy in Parallel Systems
Share this:





.svg)






-899.svg)


